Integrate JWT to your Authentication system within 10 minutes
Welcome! In this article we will be learning how to manage user sessions using JSON Web Tokens (JWT). At the end we will also build a simple referral system to demonstrate the workflow with JWT.
If you already have a user authentication system, you can refer to this article to integrate JSON web tokens securely in your existing project.
Without wasting more time on the introduction let us get started.
This post is the continuation(Part II) of my previous article, in which I have shown the implementation of user signup with email verification, forgot password and reset password features. If you want to take a look at Part I, use this link.
Let us have a look at our Login API.
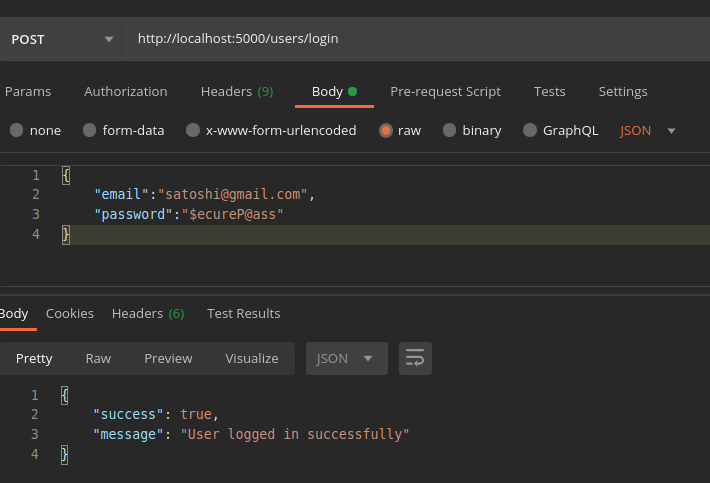
Here, we can see that, once the user has been logged in we just return the success flag and a message which is not sufficient for creating a valid session. Now let us create an access token (valid for 1 hour) for every login and send it to the client.
What is JWT?
A JWT is just a session data payload JSON format that is cryptographically signed by the server.
More detailed explanation:
JSON Web Token (JWT) is an open standard (RFC 7519) that defines a compact and self-contained way for securely transmitting information between parties as a JSON object. This information can be verified and trusted because it is digitally signed. JWTs can be signed using a secret (with the HMAC algorithm) or a public/private key pair using RSA or ECDSA.
Generating the token
Install the “jsonwebtoken” module using the command:
npm i jsonwebtoken --saveInside the users/helpers folder, create a file generateJwt.js
const jwt = require("jsonwebtoken");
require("dotenv").config();

const options = {
  expiresIn: "1h",
};

async function generateJwt(email, userId) {
  try {
    const payload = { email: email, id: userId };
    const token = await jwt.sign(payload, process.env.JWT_SECRET, options);
    return { error: false, token: token };
  } catch (error) {
    return { error: true };
  }
}

module.exports = { generateJwt };
Add your JWT Secret in the .env file
JWT_SECRET = <SOME_LONG_SECRET_KEY>This JWT Secret will be used as the key for signing the payload.
Save the files and start the server.
Update the user schema to store the accessToken.
accessToken: { type: String, default: null }Let’s import the generateJwt function in user.controller.js file and use it to create an access token.
exports.Login = async (req, res) => {
  try {
    const { email, password } = req.body;

    if (!email || !password) {
      return res.status(400).json({
        error: true,
        message: "Cannot authorize user.",
      });
    }

    //1. Find if any account with that email exists in DB
    const user = await User.findOne({ email: email });

    // NOT FOUND - Throw error
    if (!user) {
      return res.status(404).json({
        error: true,
        message: "Account not found",
      });
    }

    //2. Throw error if account is not activated
    if (!user.active) {
      return res.status(400).json({
        error: true,
        message: "You must verify your email to activate your account",
      });
    }

    //3. Verify the password is valid
    const isValid = await User.comparePasswords(password, user.password);

    if (!isValid) {
      return res.status(400).json({
        error: true,
        message: "Invalid credentials",
      });
    }

/************************************************************************/
    //Generate Access token
    const { error, token } = await generateJwt(user.email, user.userId);
    if (error) {
      return res.status(500).json({
        error: true,
        message: "Couldn't create access token. Please try again later",
      });
    }
    user.accessToken = token;
/*************************************************************************/

    await user.save();

    //Success
    return res.send({
      success: true,
      message: "User logged in successfully",
      accessToken: token,  //Send it to the client
    });
  } catch (err) {
    console.error("Login error", err);
    return res.status(500).json({
      error: true,
      message: "Couldn't login. Please try again later.",
    });
  }
};
Yes, we are saving the Access Token in our DB. Many of you may think that it is not the proper way of using JWT as the main use of JWT is to facilitate stateless authentication, which means we need not store information in the server. Because JWT itself contains information like expiration time, payload, issuer, etc., But my goal is to create a secure API using JWT and I mean it.
For those who are still interested why do I store the access token in DB, what I am doing is whitelisting the token. We must either whitelist or blacklist the token in order to improve the security of the underlying system. The most preferred way is blacklisting, the search space will be much lesser when compared to whitelisting.
Now let us login from the Postman:
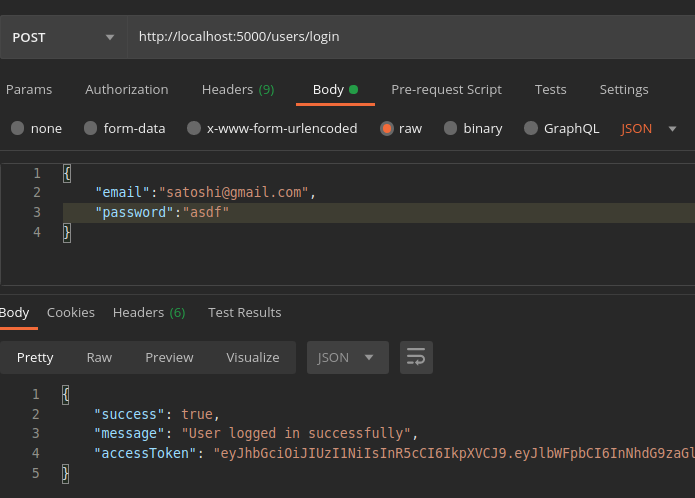
Cool! We got the access token which is valid for 1 hour. We will not get the same token every time. Each time a different token will be generated for everyone.
JWT Gotcha
Another misconception about the JSON web tokens is that the token is encrypted and all information stored is completely safe. We must understand that our payload is “signed” it is not “encrypted”.
Let’s do some experimentation.
This the access token that I received in the response:
eyJhbGciOiJIUzI1NiIsInR5cCI6IkpXVCJ9.eyJlbWFpbCI6InNhdG9zaGlAZ21haWwuY29tIiwiaWQiOiJjYzkyZWNiYi1lOTlhLTQ4NWItOWFjMy04MTcwMWNkOWU5YmUiLCJpYXQiOjE2MTA3MzkwOTAsImV4cCI6MTYxMDgyNTQ5MH0WKE_E3WB8s1yCpB1KO63wYtqxd_sjY_DDVldsxbrMqcOpen a new tab in your browser, visit http://calebb.net/ and paste the token.
You’ll see something like this

Yes, it is possible to retrieve the JSON payload which we store inside the JWT by decoding without the key. **The secret key is required only for verifying whether the JWT is valid.**Hence we should never store sensitive information like passwords, API keys, etc in the JWT payload.
Once again I emphasize that JWT is not secure by itself. It depends upon how we use it.
Implementing a Simple Referral System
To understand how to implement secure endpoints, we will create a simple referral system.
Here’s how it works:
-
Generate a referral code for the user during registration and save the code in DB.
-
While signup, get a referral code from the user.
-
Check whether that referral code exists in the DB.
-
If it exists then store the details, else throw an error.
For generating the referral code, we will use a short unique Id generator “nanoid”.
Install the dependency.
npm i nanoid --saveWe will be using a custom character set that will include the characters A-Z, a-z, and 0–9 to generate referral code.
const Joi = require("joi");
require("dotenv").config();
const { v4: uuid } = require("uuid");

const { customAlphabet: generate } = require("nanoid");  // 1. Require the nanoid module

const { generateJwt } = require("./helpers/generateJwt");
const { sendEmail } = require("./helpers/mailer");
const User = require("./user.model");

const CHARACTER_SET =
  "0123456789ABCDEFGHIJKLMNOPQRSTUVWXYZabcdefghijklmnopqrstuvwxyz";

const REFERRAL_CODE_LENGTH = 8;

const referralCode = generate(CHARACTER_SET, REFERRAL_CODE_LENGTH);

//Validate user schema
const userSchema = Joi.object().keys({
  email: Joi.string().email({ minDomainSegments: 2 }),
  password: Joi.string().required().min(4),
  confirmPassword: Joi.string().valid(Joi.ref("password")).required(),
  referrer: Joi.string(),   // 3. Include the field
});

exports.Signup = async (req, res) => {
  try {
    const result = userSchema.validate(req.body);
    if (result.error) {
      console.log(result.error.message);
      return res.json({
        error: true,
        status: 400,
        message: result.error.message,
      });
    }

    //Check if the email has been already registered.
    var user = await User.findOne({
      email: result.value.email,
    });

    if (user) {
      return res.json({
        error: true,
        message: "Email is already in use",
      });
    }

    const hash = await User.hashPassword(result.value.password);

    const id = uuid(); //Generate unique id for the user.
    result.value.userId = id;

    delete result.value.confirmPassword;
    result.value.password = hash;

    let code = Math.floor(100000 + Math.random() * 900000);

    let expiry = Date.now() + 60 * 1000 * 15; //15 mins in ms

    const sendCode = await sendEmail(result.value.email, code);

    if (sendCode.error) {
      return res.status(500).json({
        error: true,
        message: "Couldn't send verification email.",
      });
    }
    result.value.emailToken = code;
    result.value.emailTokenExpires = n
Also, add the following fields to the user schema.
referralCode: { type: String, unique: true },
referrer: { type: String, default: null }
After making all the changes, our user model will look like this:
const mongoose = require("mongoose");
const bcrypt = require("bcryptjs");
const Schema = mongoose.Schema;

const userSchema = new Schema(
  {
    userId: { type: String, unique: true, required: true },
    email: { type: String, required: true, unique: true },
    active: { type: Boolean, default: false },
    password: { type: String, required: true },
    resetPasswordToken: { type: String, default: null },
    resetPasswordExpires: { type: Date, default: null },
    emailToken: { type: String, default: null },
    emailTokenExpires: { type: Date, default: null },
    accessToken: { type: String, default: null },
    referralCode: { type: String, unique: true },
    referrer: { type: String, default: null },
  },
  {
    timestamps: {
      createdAt: "createdAt",
      updatedAt: "updatedAt",
    },
  }
);

const User = mongoose.model("user", userSchema);
module.exports = User;

module.exports.hashPassword = async (password) => {
  try {
    const salt = await bcrypt.genSalt(10);
    return await bcrypt.hash(password, salt);
  } catch (error) {
    throw new Error("Hashing failed", error);
  }
};
module.exports.comparePasswords = async (inputPassword, hashedPassword) => {
  try {
    return await bcrypt.compare(inputPassword, hashedPassword);
  } catch (error) {
    throw new Error("Comparison failed", error);
  }
};
Now save the file and restart the server.
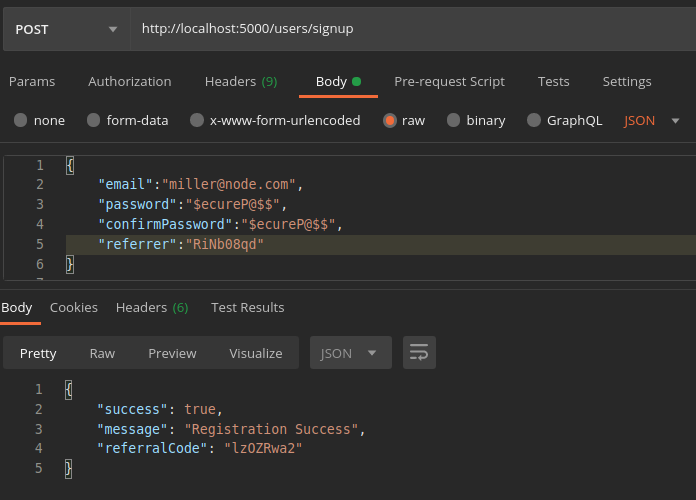
Let us signup and check whether everything if working fine as expected.
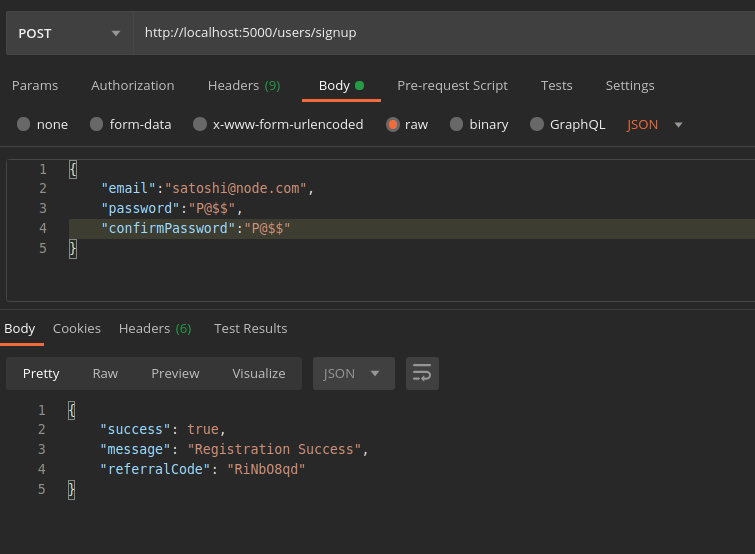
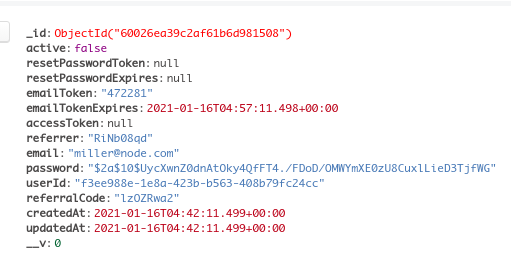
Cool! We got our referral code RiNb08qd . Let us take a look at our collection in DB.
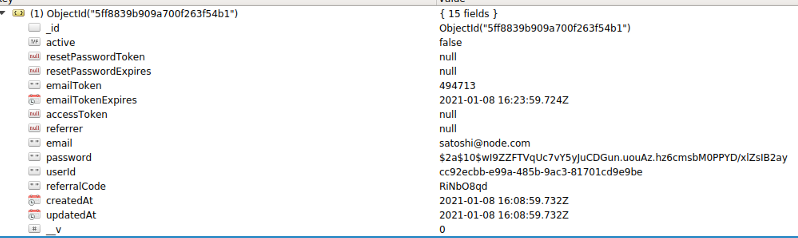
We can see that the referralCode has been added to the user collection.
Let’s assume that we have shared this referral code with some of our friends. So he/she enters our referral code during registration.
It works! Our friend was able to sign up with our referral code.
Now let us add some more functionality to our project. Say, that we need to retrieve all the accounts that have been registered with our referral code, and when we log in, it must be displayed on our dashboard.
The flow
-
After successful login, store the JWT on the client-side (in local storage, indexed DB or so).
-
Then call the GET /referred endpoint with the access token in the authorization header.
-
Verify whether the token is valid, find the user-id by decoding the user-id from the JWT payload.
-
Using the user id fetch the referral code, then find all the collections in which the referrer field matches the referralCode.
But how do we validate the JWT passed in the header? Simple, we need to call the verify API that is present in the jsonwebtoken module, as we used the sign API. Let’s go ahead and implement the middleware that is used to validate the access token.
In the middlewares folder, create a file called validateToken.js
const jwt = require("jsonwebtoken");
require("dotenv").config();

const User = require("../src/users/user.model");

async function validateToken(req, res, next) {
  const authorizationHeader = req.headers.authorization;
  let result;
  if (!authorizationHeader)
    return res.status(401).json({
      error: true,
      message: "Access token is missing",
    });

  const token = req.headers.authorization.split(" ")[1]; // Bearer <token>
  const options = {
    expiresIn: "1h",
  };
  try {
    let user = await User.findOne({
      accessToken: token,
    });

    if (!user) {
      result = {
        error: true,
        message: `Authorization error`,
      };
      return res.status(403).json(result);
    }

    result = jwt.verify(token, process.env.JWT_SECRET, options);

    if (!user.userId === result.id) {
      result = {
        error: true,
        message: `Invalid token`,
      };

      return res.status(401).json(result);
    }

    result["referralCode"] = user.referralCode;

    req.decoded = result;  // append the result in the "decoded" field of req

    next();
  } catch (err) {
    console.error(err);
    if (err.name === "TokenExpiredError") {
      result = {
        error: true,
        message: `TokenExpired`,
      };
    } else {
      result = {
        error: true,
        message: `Authentication error`,
      };
    }
    return res.status(403).json(result);
  }
}

module.exports = { validateToken };
This is a more secure way of validating a JWT token. Rather than just verifying the token ,we are checking against our whitelist (in the DB).
Now let’s define our controller to fetch all the referred accounts.
exports.ReferredAccounts = async (req, res) => {
  try {
    const { referralCode } = req.decoded; //Destruction syntax

    const referredAccounts = await User.find(
      { referrer: referralCode },
      { email: 1, referralCode: 1, _id: 0 }
    );
    return res.send({
      success: true,
      accounts: referredAccounts,
      total: referredAccounts.length,
    });
  } catch (error) {
    console.error("fetch-referred-error", error);
    return res.stat(500).json({
      error: true,
      message: error.message,
    });
  }
};
Then we must add the endpoint to our router. In the routes/users.js file, import the validateToken middleware and use it in the newly created endpoint.
+ const { validateToken } = require(“../middlewares/validateToken”);
  const AuthController = require(“../src/users/user.controller”);
  router.post(“/signup”, cleanBody, AuthController.Signup);

    ...
    ...

+ router.get(“/referred”,validateToken,AuthController.ReferredAccounts);
After updating the files, let us test our endpoint.
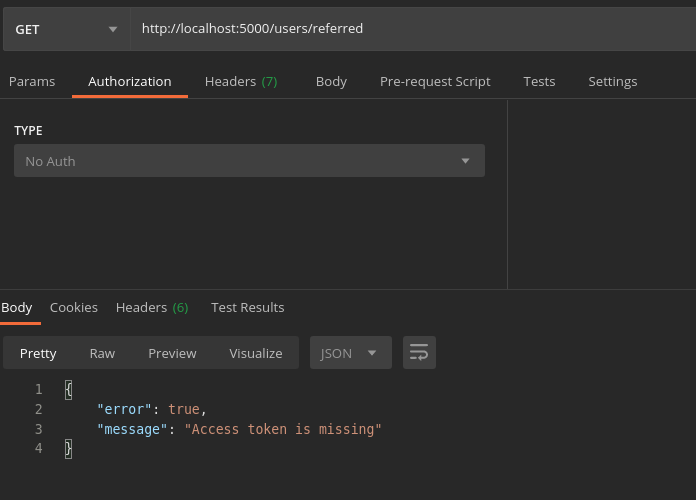
Our middleware throws the error Access token is missing. Let test the by passing a random token as the header.
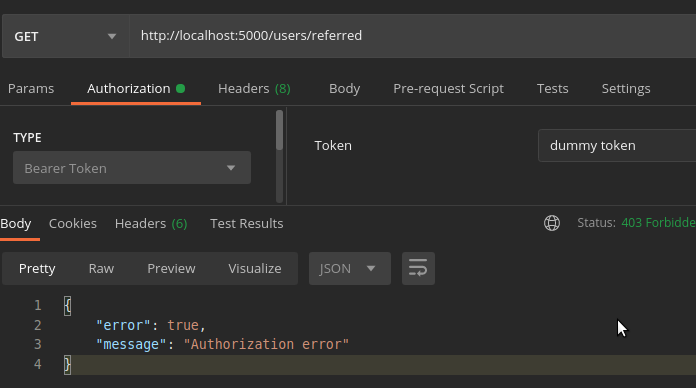
It works! Now let us login to obtain a valid access token.
Now let us pass this access token in the Authorization header as the Bearer token.
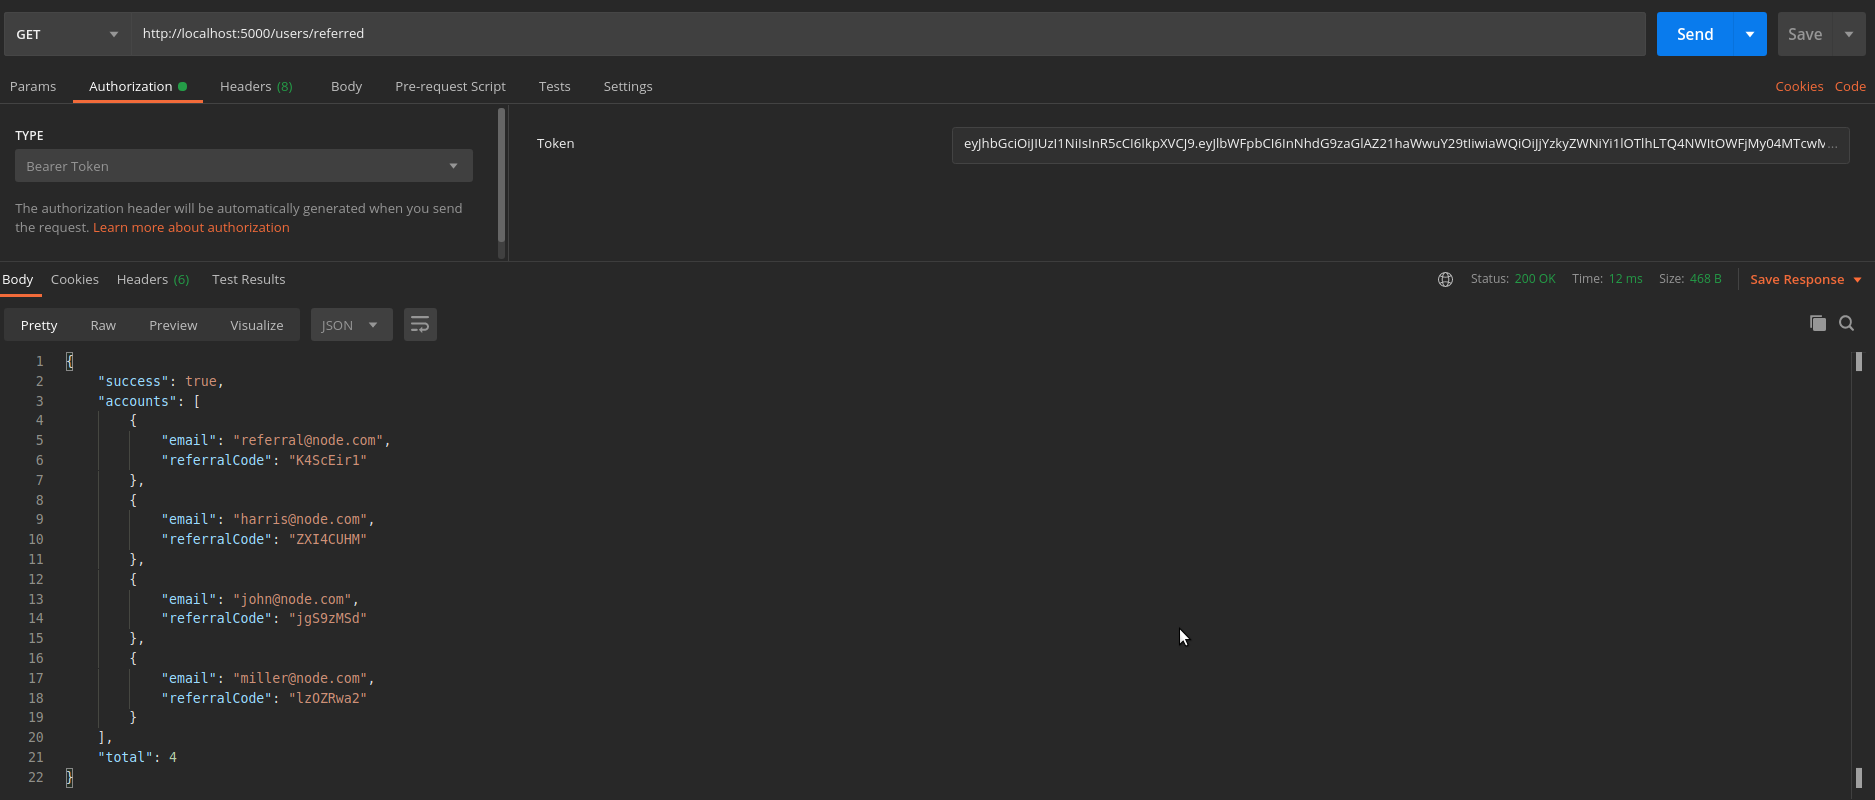
Boom! We got all the accounts who have registered using our referral code. Hence using the JSON Web Tokens we can secure as many endpoints as we need as we did for the GET /referred endpoint.
Now, let us define the controller and endpoint to logout the user. User logout controller is straightforward. We need to just clear the access token from the DB that’s it.
exports.Logout = async (req, res) => {
  try {
    const { id } = req.decoded;

    let user = await User.findOne({ userId: id });

    user.accessToken = "";

    await user.save();

    return res.send({ success: true, message: "User Logged out" });
  } catch (error) {
    console.error("user-logout-error", error);
    return res.stat(500).json({
      error: true,
      message: error.message,
    });
  }
};
It’s also a protected endpoint, only the logged in users with a valid access token should be able to logout.
After adding the logout endpoint to our routes/users.js file, it will look like this.
const express = require("express");
const router = express.Router();
const cleanBody = require("../middlewares/cleanbody");
const { validateToken } = require("../middlewares/validateToken");
const AuthController = require("../src/users/user.controller");
router.post("/signup", cleanBody, AuthController.Signup);
router.patch("/activate", cleanBody, AuthController.Activate);
router.post("/login", cleanBody, AuthController.Login);
router.patch("/forgot", cleanBody, AuthController.ForgotPassword);
router.patch("/reset", cleanBody, AuthController.ResetPassword);
router.get("/referred", validateToken, AuthController.ReferredAccounts);
router.get("/logout", validateToken, AuthController.Logout);
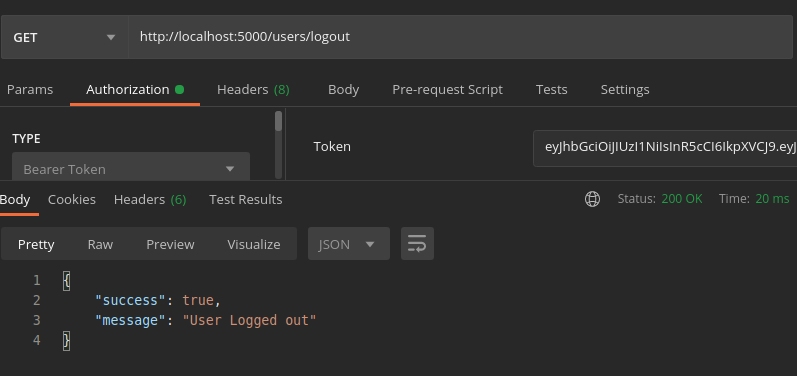
module.exports = router;Finally let us check the logout endpoint.
Let’s try to fetch the referred accounts using the same token.
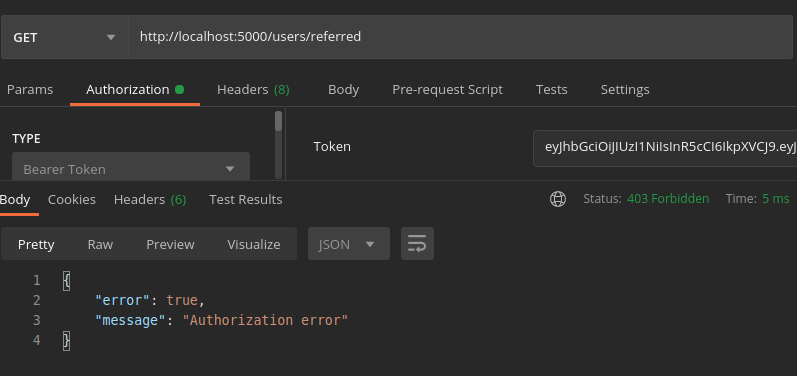
Great! It works as expected. If you check the user’s collection, the access token would have been cleared from the user document. Hence, we have successfully (and securely) integrated JWT into our authentication system.
You can find the entire source code in this GitHub repository.
Conclusion
In this era of the modern web, there is nothing called “this is the correct method” to implement a feature. It varies from system to system based on the requirements. So let us explore and learn something new every single day!
If you have any doubts or queries about this post, I’m always open to discussion.
Thanks for reading!