Create your own BEP20 tokens on Binance Smart Chain (BSC)
Right from the beginning of the DeFi Summer of 2020, a lot of new cryptocurrency and blockchain-related projects flooded the Ethereum network which resulted in the hike in gas price. People were in a situation to pay a 100 transaction. So, everyone started to migrate their projects and infrastructure to various gas efficient platforms and one among those platforms is the Binance Smart Chain (BSC).
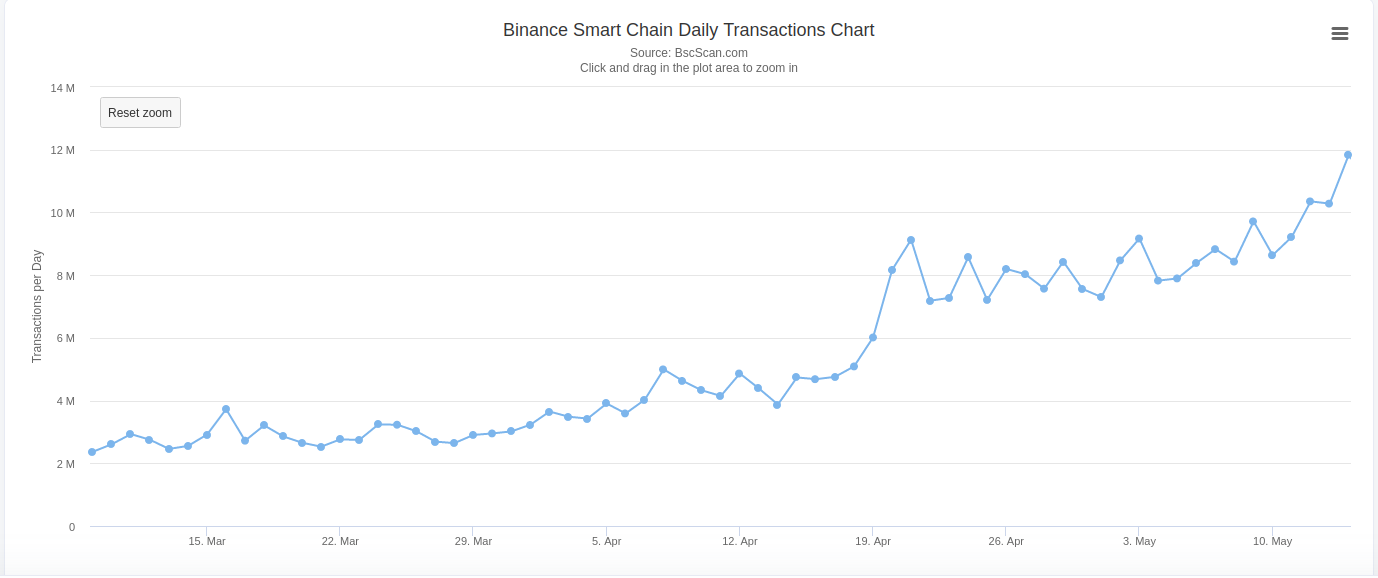
In a nutshell, BSC is almost a similar blockchain to Ethereum, but with some small changes. It has EVM support as well. So any smart contract that runs on Ethereum can be deployed on the BSC. As of May 14, 2021 — the number of daily transactions has reached a tremendous mark of 12M.
Almost in all DeFi projects, one of the common components is a BEP20 token native to the project which will be used for some specific purposes within or even outside their platform. BEP20 token standard is almost similar to the ERC20 standard on Ethereum.
In this article, we will learn to create and deploy a very basic and simple BEP20 token to the BSC testnet using the Remix and MetaMask
Token Details
-
Name: SampleBEP20 Token
-
Symbol: SBT
-
Total Supply: 1 million SBT
The BEP20 Token Contract
You can access the target smart contract here: https://gist.github.com/PraneshASP/2e18a11d8ee79ae0baa8429fe4ecda49
The Steps
#1. Open up your browser (in which MetaMask is configured) and navigate to the Remix IDE.
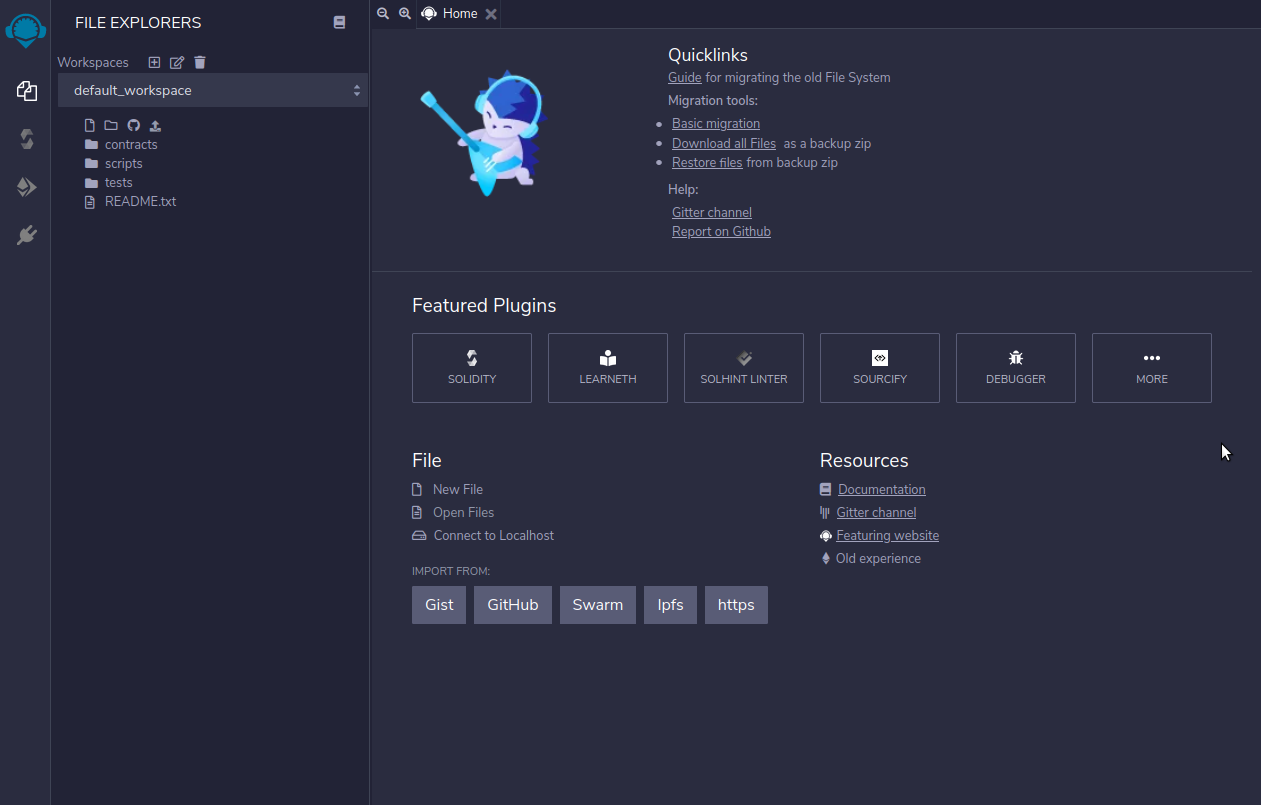
#2. You can import the file using this Gist link. Or you can also create a new file called SampleBEP20Token.sol and add the code of the BEP20 Token Contract given above.
#3. We should compile our code before deployment. Pressing Ctrl + S keys will compile the code. Also we can navigate to the compilation page by clicking the second option on the navigation panel (leftmost).
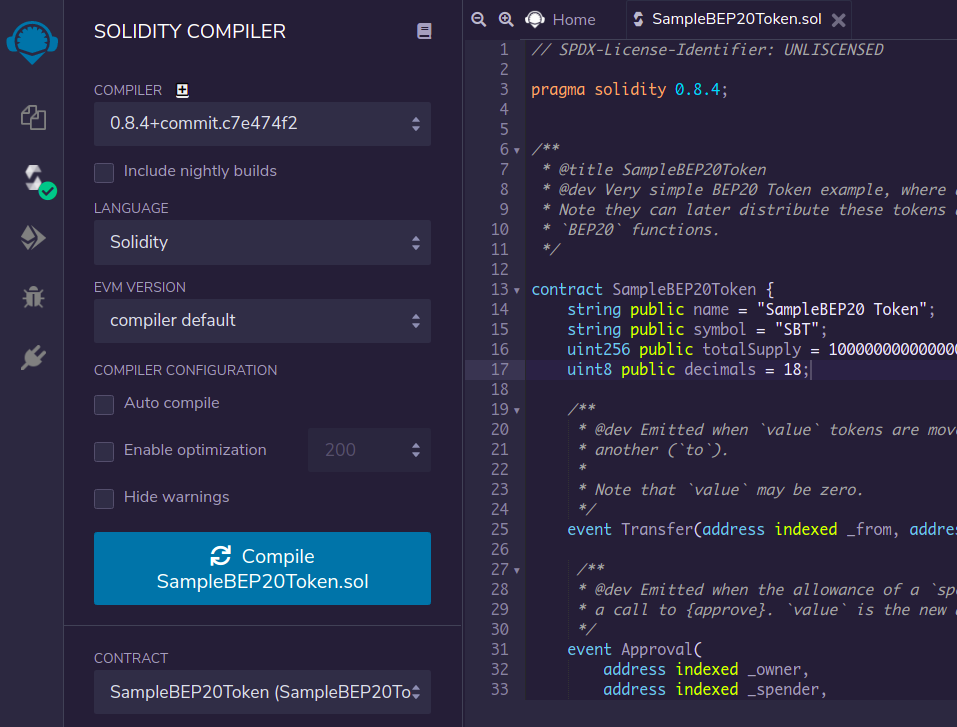
We have specified the solidity version as 0.8.4 in our code, so we need to choose the same compiler version in the remix also.
#4. After successful compilation, we can move ahead to the deployment panel by clicking the icon below the “Compiler” icon.
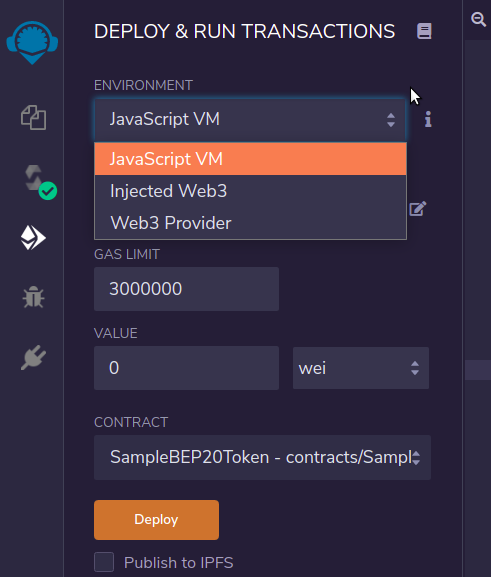
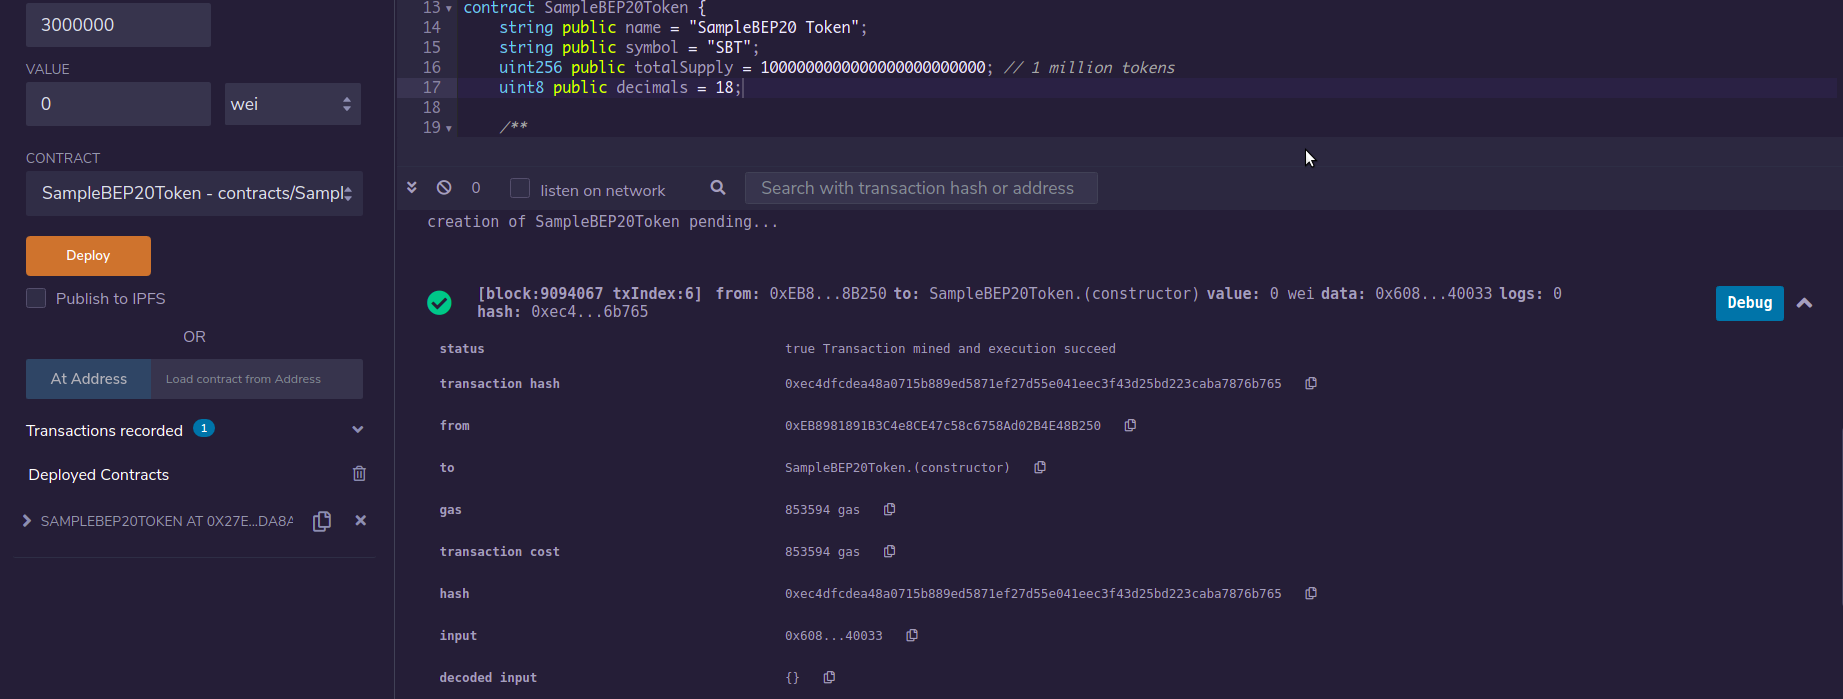
The ENVIRONMENT should be Injected Web3 as we are using MetaMask to deploy. Also make sure that you have selected the SampleBEP20Token contract in the CONTRACT dropdown (above the Deploy button).
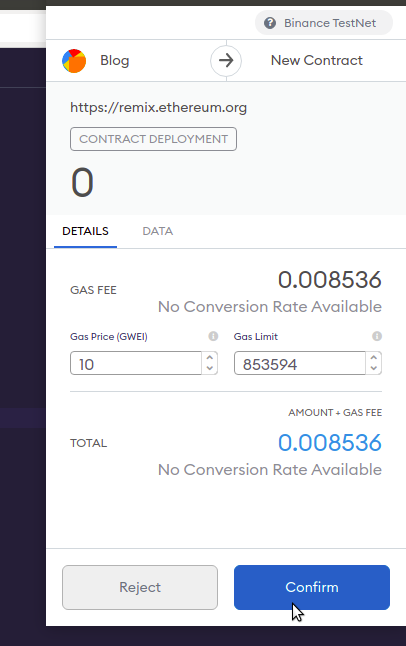
We are all set to deploy our SBT token. Hit the Deploy button. It will trigger a MetaMask popup for confirmation. Click Confirm to deploy the token.
#5. Once the transaction is mined, we can see the logs as well as the contract details will appear under the Deployed Contracts section.
#6. If we click on the SAMPLEBEP20TOKEN option under the Depolyed Contracts we can see the public methods and variables, with which can test our deployment. Let us check the balance of the contract owner.
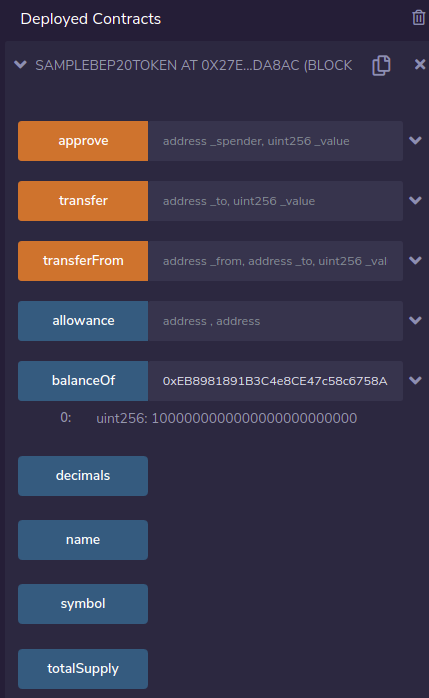
Woah 🎉🎊 Now we can see that owner/admin owns the total supply of the token which is as expected.
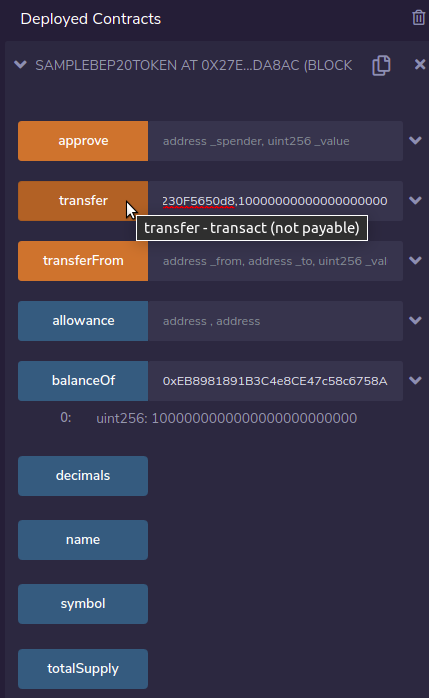
#7. Let us now try to transfer the tokens to another wallet using the transfer method. Once the recipient address and the amount to send(in 18 precision) are entered, click on the transfer button. There will be a popup from the MetaMask again requesting for confirmation of the transaction. Note that this popup includes the amount of token that we entered.
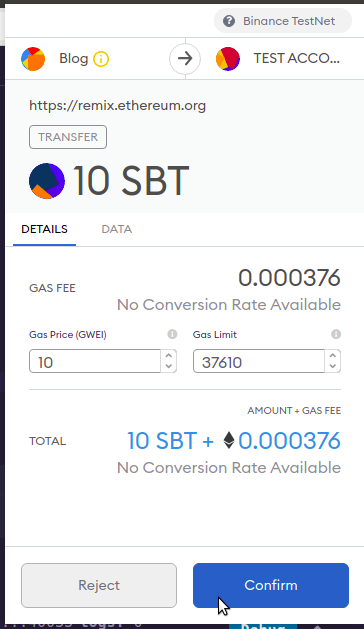
Click on the Confirm button to push the transaction. In a few seconds the transaction status can be seen on the Remix IDE logs. We can check the transaction status on BSCScan Testnet explorer as well.

Now if we again check the balance of the owner wallet using the balanceOfmethod on Remix, it will be 10 tokens less than a million.

The recipient wallet will be credited with 10 SBT.
Cool 👏👏 Now you can deploy as many tokens as you want.The same procedure can be followed to deploy smartcontracts on BSC mainnet. But it will cost mainnet BNB for gas.
✨ Bonus: Adding our token to MetaMask
Now we will check the SBT balance of our recipient wallet(which is also one of my accounts) on MetaMask.
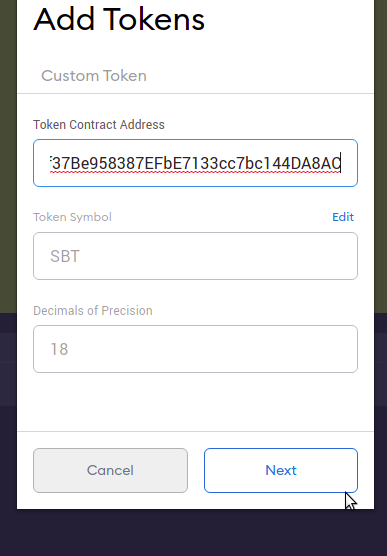
- Click on the Add Token button on the bottom of the selected MetaMask account.

- Enter the contract address which we deployed. The token name and token symbol will be automatically detected. Click on Next .
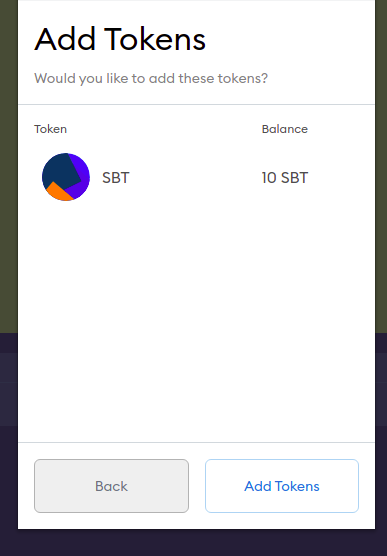
- The token balance of the account will be displayed in the next step. Click Add Tokens to add the tokens to the MetaMask account.
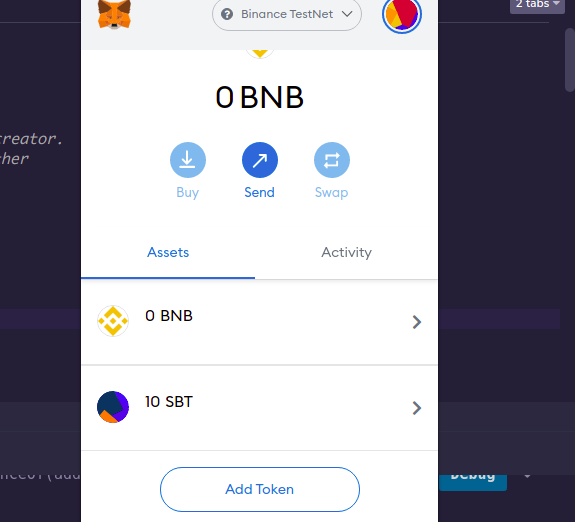
Once added, the token can be found under the Assets section of the MetaMask account to which the token was added.
 .
.
The same method can be followed to add any of the deployed tokens on the chosen network, in our case it was BSC Testnet .
Happy coding 🎉🎉